Showing posts with label bias binding. Show all posts

Thursday, April 18, 2013

How to join your binding ends on a quilt top

Wow I've finished my quilting on my small chevron quilt and now I'm ready to put on the binding. It feels good to be getting a project done even if it is small. I used some of the purple with white dot material that I had already cut into bias binding, so far this binding will have completed 3 projects and there's still quite a bit more left. While I was putting on the binding I was thinking I wanted the join to also be at an angle like all of my other binding seams. This has never really bothered me, but I was thinking it would be nice to hide the join. After all, how hard could it be?

First off if you have never sewn on your binding before you want to make sure you have some extra length and you will start off somewhere usually in the middle of a side and leave a tail of binding say about 10-15" (this really doesn't have to be exact . Sew all the way around again leaving a tail about 10-15", your tails should be something like this below. Basically you just need enough extra on both ends to overlap each other about 3-5" (more is always good)
As you can see I have plenty of overlap this is better than not enough, the more quilts you do the better you'll be able to judge this. Next I will be laying my binding tails even my quilt edge and on top of one another. In the picture below I staggered them slightly to show you where they overlap.
 We are going to trim this to a ¼". Below I've lined up my fabric and placed my ruler ¼" to the right of where the two fabrics meet (as I've shown above). I mark this with my pencil. As you can see I used the 45° angle on my ruler to make sure my line would also be 45°.
Next you'll open up your binding you just marked with your pencil and continue marking your line.

Next I place my ruler on the pencil line, again using the 45° line to make sure my cut is perfect and cut.
Now I lay my bindings even again with the edge of my quilt and make sure they have a ¼" overlap.
Next we can sew them together. I open up both ends and put them right sides together(as shown below), leaving a ¼" triangle overhang on both sides. Then sew a ¼" seam.
Now you can line up your binding with your quilt edge once again and finish sewing it down. Now all your seams are going at a 45° angle and no one will know where you binding started and stopped.

How do you finish your quilts?

Thanks for reading♥ Olivia

Thursday, November 1, 2012

Bias Tape continued

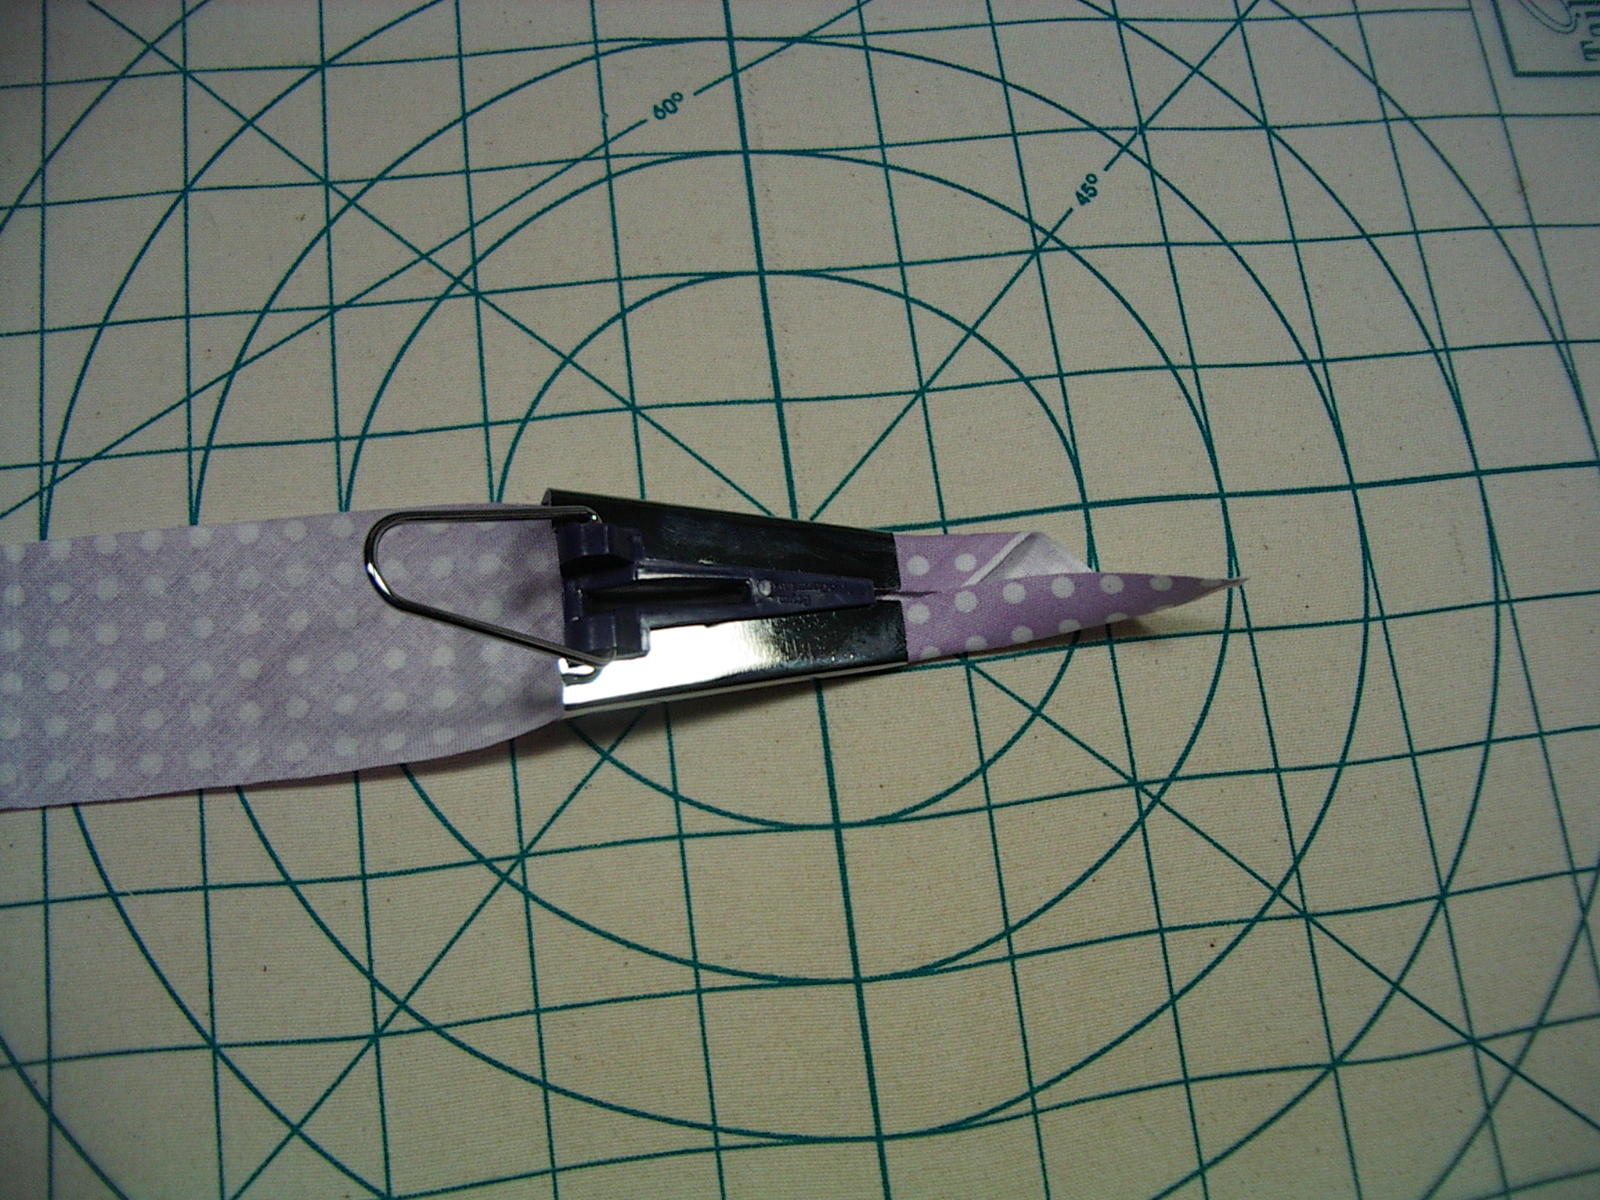
I found another bias tape maker on one of my trips to Joann's they had a limited selection in the store but have other brands and size options on their website. In store they carry the Dritz brand found in the quilting notions section.
Here's the one I got.
It definitely looks different than the one I currently have seen in this post.


I decided to try it out...
 At first my results were a bit disappointing this certainly doesn't look very even.
 But I fiddled with it a little more...
 And I'll say that it came out okay.
I definitely see room for improvement either in my patience and skills or these devices. I still really like the paper bias tape make from my earlier post. I think the reason is the extra guides after your fabric has been turned that keep it even so you can iron it down, I think I might try a combination of metal and paper guide next time I make a lot of bias tape.

Has anyone tried the Clover brand bias tape makers? I'm curious how or if they differ any from the Dritz brand Nancy Zieman has a set and a video. Her's come out so perfectly and even how does she do it?
Thanks for reading♥

Thursday, October 25, 2012

how to make bias tape

My previous posts have covered cutting and sewing for bias strips and today I'm going to cover how to make bias tape. This is where you essentially fold over the edges on either side of your bias strip to encase the raw edges.
This is single fold bias tape
 and this is double fold bias tape
For the double fold bias tape you simply iron in half the single fold. It's that easy. The hard part is making the single fold bias tape to begin with. Your dealing with stretchy bias cut fabric and no it does not play nice with the iron. Which brings me to the first method which is to iron the old fashioned way by hand. Yes that's right by hand which if your anything like me will drive you nuts because the results are so inconsistent and it would take for-ever.

The second method involves a metal tool which I'm guessing has been around for ages but has perhaps had some improvements. I had one such tool lying around and mine looks like this.
 The newer bias tape makers look quite different from the back and seem to have a flat tip on both the top and bottom of the unit. If you search these tools you'll see the difference. 
Nancy Zieman has a video on how to use this tool, and for her it works perfectly (hers being the newer version perhaps). Anyways I could not get this to work for me and to top it off this was not the right size. Also these cost anywhere from $6 to $15 depending on the size you get, if the new ones work and you make a lot of bias this would be worth it. I'm curious if the newer styles work better.

So that Idea scrapped I found online another method promising an easy no cost method. Place pin in ironing surface making a gap the size of desired tape and simply pull through. WRONG! This takes the old fashioned ironing by hand method and basically gives you a helping hand but you still end up with sloppy inconsistent work. Is it too much to ask for prefect results.

Then lastly I wandering onto this blog scientific seamstress science + sewing = perfection. This lady is just awesome she created this wonderful device that I would buy in a heartbeat and she is offering it to her readers for free. Here's the link to her bias tape maker. It worked wonderfully with perfect results and was worth the effort of assembly and as I said I would buy it in a heartbeat.

Here's how it worked for me.
Honestly I was a little doubtful and thought it would be super complicated but really it was super easy 4 pieces and I used "terrifically tacky tape" for paper crafting instead of glue (since I can be inpatient) and it worked wonderfully. If you are looking to make bias tape try this you won't be disappointed.

What methods have you tried and which do you prefer?

Thanks for reading♥

Monday, October 22, 2012

How to sew your Bias cut strips together

In my last post I covered how to cut bias strips which can be used for bias binding or bias tape. Here's how I joined those strips together.

Each end of my bias strips is at a 45° angle if you refer back to my previous post (below) you can see the second strip from the left does not have a 45° angle. This was only with the fat quarter, when I cut my 44 x 44" fabric square into strips all my ends were 45°. This is were I would recommend always working with a square.

Matching right sides together I join my strips with ¼" seams at the valleys.
If you check with a ruler your stitching should be on the ¼" mark.

Now when you open your strip it should look like this.

I ended up with a pile like this
Then it's off to the ironing board were you can either iron it in half for quilt binding
 or you can make bias tape.

My 44" square of fabric made 22½ yards of bias binding.
The fat quarter made just a little shy 4½ yards. 
Which if you do the math is nearly the same per ¼ yard of fabric

Thanks for reading♥

Thursday, October 18, 2012

How to cut bias binding or bias tape

I've always bound my quilts with regular strips of fabric which honestly has worked great but with seeing rounded corners and curves on quilt edges I knew I'd would have to change my methods. Here's how to fold your fabric to cut bias strips with your rotary cutter.
I'm going to demonstrate the following with a fat quarter which is 18 x 22 working with a square would be best but to satisfy even my own curiosity I'm going to use the whole fat quarter to see how much it makes.

First I like to lay my fabric face down.
Then fold the top left corner down to the bottom. with a square you would just match corner to corner.
Next take the upper right and bring it down to the lower left.
 Make sure to match up the bottom edges as shown below. 

when folded it will look like this. If you were working with a square you would now have a triangle shape.
Now we are going to take the bottom left and fold it up to the upper right. This makes more sense when your working with a larger piece of fabric because you need to fold it up to a manageable piece to cut.

And finally turn to face you. 

Onto the cutting. The small triangles on the right are all that's left for waste.
The next photos are of the large 44 x 44" piece of fabric I cut. I wanted to work with a square this time.
I folded my fabric exactly the same as above for the fat quarter.
Then I marked my ruler with glow line tape.

First I cut off the folded edge to my left.
and then proceeded to cut strips all the way to the end, the last little triangle cut at the end was my waste.
That was a lot to cover in one post. Lots of pictures. I hope all the instructions are clear, please let me know if anything doesn't make sense. In my next post I'll cover how I sew these strips together.

Thanks for reading♥