Showing posts with label sewing. Show all posts

Wednesday, November 4, 2015

Classic Curve bag - Pattern Reveiw

I feel a like I have been sitting on this on a while and it's because I really dislike writing this as a negative review. However I have to be honest in my opinions because that's what I would want from a review.

With that said perhaps I'll do a pros and cons list of this pattern and let you decide if it's worth the purchase.


Pros:
  • I like the curve of the bag, very classic look like a high end Louis Vuitton or Dooney Burke, Coach, really a lot of high end designers have used this curve.
  • I like the double zipper, again this element is present in many high end bags.
  • I really like the zipped inner pocket and the instruction was fairly clear. Again high end bags use this technique.
  • The materials needed is very clearly listed
  • Nice roomy size

Cons:
  • I did not care for the look of the handles and that's just my personal opinion so I altered mine. However the way the instructions say to sew and turn the handles is a nightmare. I could not get mine to turn without a struggle so I ended up making my handles the way I knew how without the headache. There are easier ways to make handles than this...
  • The inner pocket ended up too tiny for me.
  • For me the long handles did not fit comfortably over the shoulder and I realize this will vary from person to person but you should never say "this will fit over your shoulder" when it's cut that close. And yes I made my handles longer per the instructions.
  • I could have really done without the pages of pattern layouts
  • Drawings instead of pictures, I find pictures to be worth a thousand words so the more of them the better.
Features:

  • $7.00 price tag
  • 9 pages of instructions
  • 2 pages on how to layout your materials
  • 5 pages for your pattern peices
I think the rundown for me is this is a classic bag that has been made by many designers, particularly those on the higher end. The details such as the inner zip pocket is something you find on almost every purchased handbag hanging in your closet. With that said if you are new to making bags and want to learn some new techniques for construction that will give you that professional look then this pattern may teach you a thing or two.

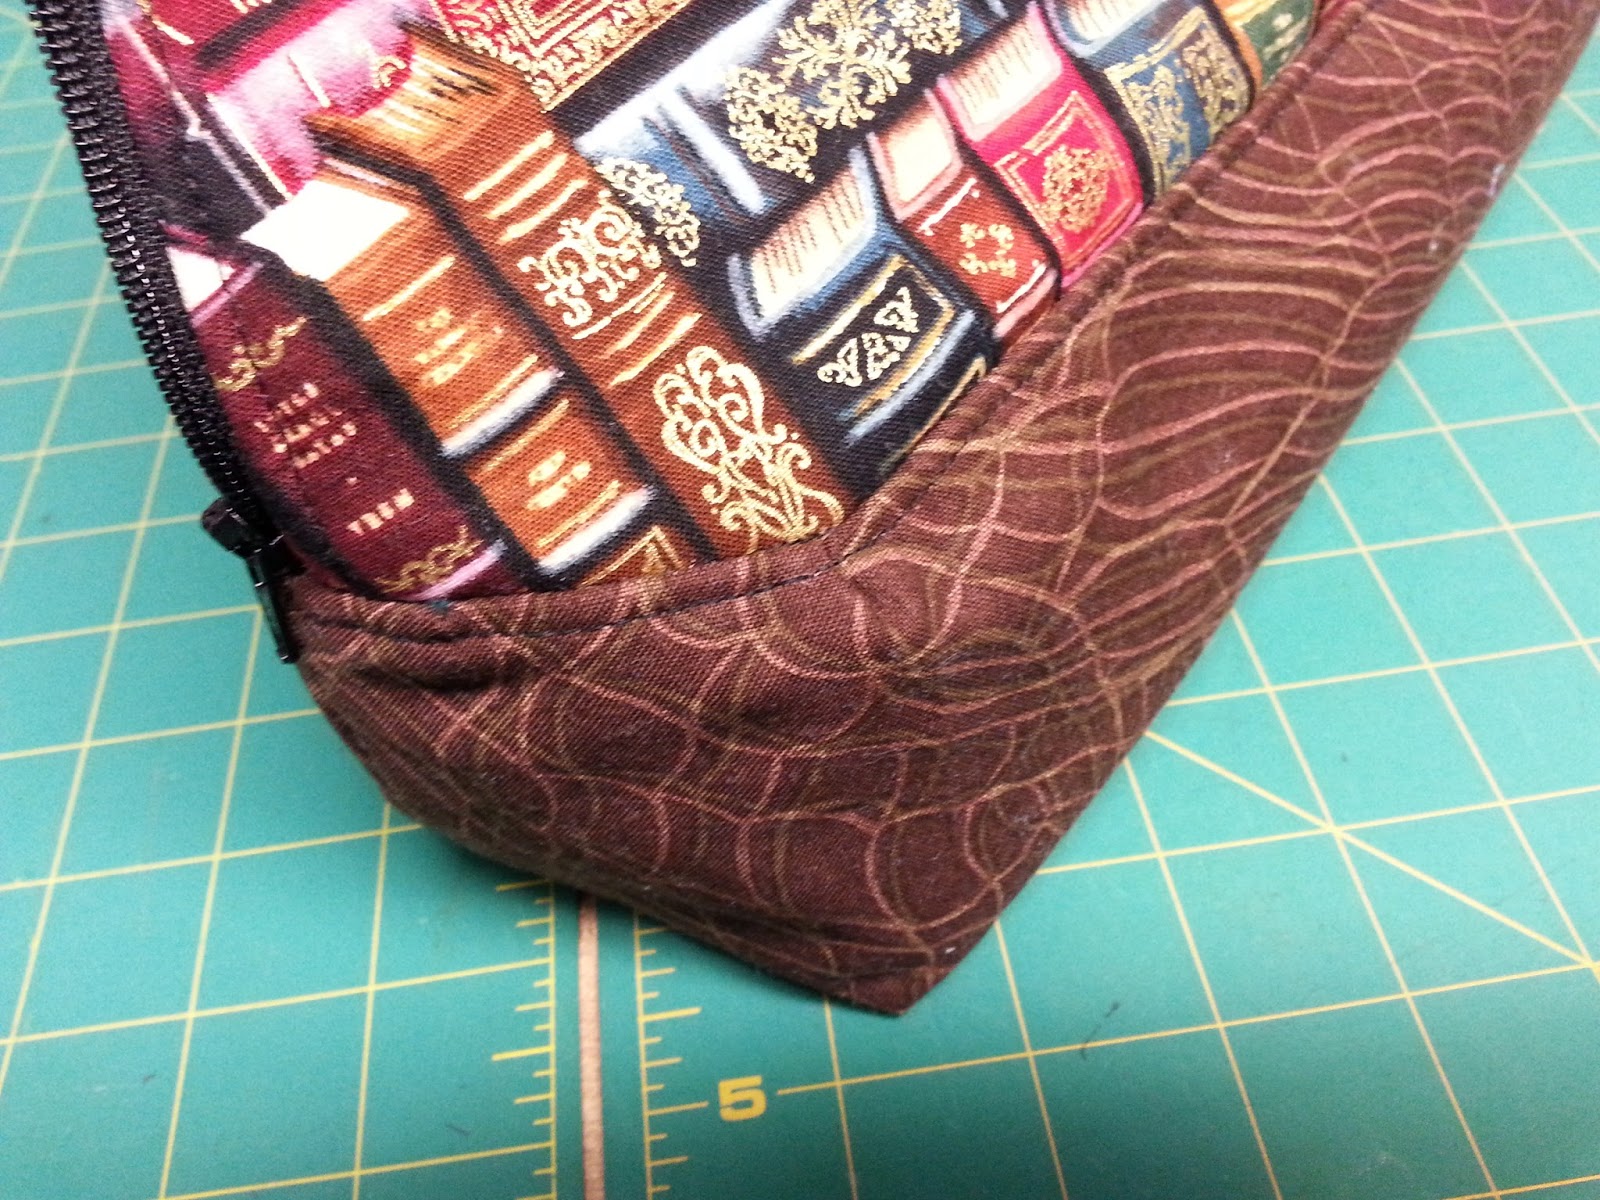
I felt the construction of the bag started out clean and nice but when I got to that last few steps it failed me or the pattern pieces failed me. See the last picture for the bunched up bottom corner ugh! I want to love my bag however I am frustrated that it doesn't fit over my shoulder. Now before all of you expert sewers scold me for not measuring my strap needs remember I'm thinking from the perspective of the newbie or buyer who may not know how to alter and be equally as frustrated. Also I wanted to try and follow the pattern as is. That's why I started out making the handles as described even though that is a way I found to be difficult and in this case downright impossible.

Will I make this bag again? Yes with several changes, heck I may even start over from square one.
Was it worth $7.00?  Yes and No. I realize that this is not an answer but I honestly feel very on the fence about this purchase. I think the value is not $7.00, so worth buying just not at $7.00 price tag.




Thanks for reading♥ Olivia

Sunday, October 4, 2015

Mixer Cover Pattern

After brushing the dust off of my beloved kitchen aid mixer and baking a batch of cookies for my hubby a light bulb went off. I need a mixer cover to keep my kitchen aid clean and dust free so it's ready to go when baking inspiration strikes! So I decided to make one, and I created a pattern to go along with it.

LOVE avocados so naturally I had to make my cover using this delicious fabric from timeless treasures.


The pockets on the side can hold instruction manuals, accessories, or whatever you want to have at the ready with your mixer.


Under my cover (oh my!) I have my splatter guard and my 3 different mixing attachments inside my bowl. My cord is securely wrapped around the base. All of this fits easily under my cover. There's even still room left in the bowl for other accessories. 


This is a great gift idea, perfect for: birthdays, bridal shower or wedding gift, house warming gift. Great thing is you can customize this mixer to coordinate with the recipients kitchen theme or colors.
Thanks for reading♥ Olivia

Tuesday, September 1, 2015

Sewing Machine Pincushion

Pincushion! 
I have to admit I've seen this idea floating around Pinterest and even though I try to pin as little as possible I can't deny it would be handy to have a few near at hand.


I wouldn't call this a full on tutorial but I'll explain the basics of what I did to make mine. 

I wanted my cushion to be the same length(roughly) as the area of my machine I was attaching it to. Mine was about 6 inches. The tube is 4½" wide cut and then sewn with a ¼" seam. If you want yours to be different by all means adjust the dimensions to fit your machine. 


I attached some ribbon to mine,  however I wondered if elastic would work as well. I left one end open for stuffing. Before you start stuffing away I ironed my ¼" seam so it would be easy to close.


After stuffing I laid my second piece of ribbon in the opening  and carefully sewed it shut.

Now you're done and I simply tied mine to my machine.


Thanks for reading♥

Tuesday, August 11, 2015

Tip Tuesday

 Tip Tuesday: Iron your binding.

 I was finishing up on some small projects when I discovered that  if I gave my binding a good ironing before I started my hand stitching it would lay just the way I wanted and I didn't have to fight it as I sat in front of the TV stitching away. 

I also found that my binding stayed even; sometimes when you're pulling over as you go, you pull too much and stretch your binding making it narrow in one spot. 

If I was to machine stitch my binding closed I think I would also iron my binding before hand because it just lays so nice and flat and wouldn't give you any trouble. 

Also this saved me from pinning or clipping my binding in place. I admit I can be a lazy quilter and not having to remove any extra pins or pin in the first place is fine by me.

Essentially I  iron it flat towards the edge of my quilt and then flip my quilt over and iron it down just as I would when stitching it down. Your binding will not stay in the shape as you ironed it but it will remember where you ironed it and fold and lay nice and flat as you stitch with no pulling.

Sunday, June 28, 2015

Project: End Tables

Here's a quick sneak peek at the next thing to hit my sewing table. I have all my pieces cut for this quick project now all I need is to find the time. Ha ha right! 
What I am sewing next is two small quilts designed to just fit on top of our end tables. They're antiques and this will protect the top as well as add a splash of color. I went with a very basic simple design because I didn't want anything too complicated after all we'll be setting lamps, coasters, books, remotes and whatever else on top of these. The finished quilts should measure 25½ by 20½. exactly the right size to cover the top. I will keep you updated on my progress....
Thanks for reading♥

Sunday, June 21, 2015

Garden Walk Block of the Month recap

I realize this is about 21 days too late... A lot happened and I should have known that I had bitten off more than I could chew for the month of May. So without further ado here are a sampling of the blocks I completed. In total I made 49 blocks. I am going to put them together to make a large queen size quilt.


I'm not too sure about the coloring on this last one. I wanted to show it to you so you could see that two not very contrasting colors start to look like one big blob and you lose some of the design elements.
Thanks ♥ for reading.

Friday, May 1, 2015

Block of the Month: Garden Walk

I first saw this block on an episode of simply quilts. Boy I sure do miss that show. On the show is where I first saw Eleanor Burns and her magical methods of piecing and ironing.  I have since become quite a fan of hers. I would love to visit her San Marcos Store and if I ever get the chance to meet her in person I just might fall over with excitement. Anyways back to the block. I was so in love with her methods that I purchased her book Egg Money Quilts which features the pattern Garden Walk or as some know it 54-40 or fight. Below are some examples I pulled from EQ7.

It's always interesting to see the different color variations. Sometimes the color variations are all that's different. Like below the first one is 54-40 or fight and the second one is Garden Patch. All of the pieces are the same but the colors and their values are different. Eleanor's garden walk is slightly different yet from these variations. 

These next 2 are just variations. It's always interesting to see the breakdown of the block. 

I have been working on my own Garden walk blocks using Eleanor's templates and I just love it. I can't wait to see the finish product!
Thanks for reading♥ Olivia

Sunday, February 1, 2015

Catching up...

Wow, it feels like forever. I have missed this dearly. The holidays just simply snowballed into a very crazy time for me and unfortunately that craziness has not stopped. Just a few short weeks away is Valentine's and being a florist this is the number one busiest time for us.

 I have been longing to share with you what I've been up to and I wish I could say I was sewing all the time because I really do think that's my dream job. I did work on some other crafts besides fabric ones and hopefully I will get time to share those soon.

One thing I'd like to share is something I picked up at Ikea.
 Isn't this the cutest little ironing board you've ever seen!
 I'm not sure I can pronounce it's name so I snapped a picture of it's info.
 The cute little legs fold up to make it flat.
 Here's how I decided to make room for my new addition. I noticed that it also has a hook so you can hang it up when not in use.
 I thought that maybe while I had it out I could store some rulers ans small cutting mats underneath.
Naturally I still have my old setup of my cut n' press on a roll cart next to my cut station. I haven't ironed anything yet but I am excited to sew something and try it out.

Thanks for reading♥ Olivia

Sunday, October 26, 2014

The ups and downs of adjustable straps

Recently I've been pattern making and with that I've been testing out adjustable straps. I first heard from my mother who frequently watches Nancy Zieman's show that you could make adjustable straps without any hardware. This idea greatly intrigued me and as she tried to explain the process and I tried to absorb through drawings how this was done. I was left curious and went to the internet to find more. I found a blog that sung accolades to Nancy and attempted to explain the process in pictures. I tried this process on the next bag I was making since I wanted my strap to go across the body and unfortunately it failed. The straps did not stay where I adjusted them, they worked they're way out to the farthest point as I walked. The bag that was snug to my body was now bouncing around my knee very awkwardly.
I don't want to call out this other blog but after my fail I reread her instructions to make sure I had followed them to the letter and even read down the comments and noticed other people had the same issues I was having with the straps. I searched Nancy's site with no answers or videos on this process.
I can only think that there must be something missing from the instructions, that perhaps this other blogger had miss interpreted the instructions. Without seeing Nancy's video myself I can't be sure.
I did however make a second bag and strap attempt making adjustments to the dimensions and after testing it at home I was almost certain that I had it figured out but when I took that bag out into the real world it also failed.
So I suppose in the end this post is about lessons learned. I think the next time I hear about  "adjustable fabric slides" or "no hardware adjustable straps" I will be cautious. The two bags I have already made I will have to top stitch the straps at my desired length to keep them in place. I'm still frustrated by this. But I am glad however that I tested on myself first and I didn't make any of these up as gifts I would have been mortified.

In case you were curious. First and second strap attempts...


Thanks for reading♥ Olivia

Wednesday, September 3, 2014

Pink Umbrellas

This is a quilt I finished, ages ago it seems. I used up all I could of this light green fabric with pink paper umbrellas on it. The finished size ended up being 63" X 76" so a very generous lap size quilt.


On this project I had decided to skip the corners, although it may have been in part to not enough of the pink fabric to make the setting corners. I like this type of finished edge anyway, it ended up being super easy to bind (nice gentle curves).


Thanks for reading♥ Olivia

Wednesday, July 30, 2014

Making a Petticoat

Since I have enjoyed the dress I made so much I wanted to make it a little more special with my very own petticoat. I'm thinking these will come back in style if they have not already.
After stumbling across a few Pinterest pins referring to petticoats I decided, I want one too. Practically everyone claims how easy it is to assemble a petticoat and while I don't disagree there is however a certain amount of time involved.
Mine as you can see is a simple 2 tier petticoat with an added underlining or slip to avoid the stiffness and the scratchiness of the petticoat net. I purchased a net/tulle that specifically said petticoat on the label. It's pretty stiff and could definitely add a lot of fluff. I could have really bunched up and gathered my tulle and had tons of fluff but I wanted this to be practical with the dress I would be wearing it with. An example being if my dress or skirt was more like a circle skirt and very full then it could accommodate a lot more fluff from my petticoat.
No matter what tulle you purchase even the smaller finer net is near impossible to cut perfectly straight. I tried several things with my mats, ruler, weights and other sewing notions and still struggled to get a perfect cut of fabric. Is there a trick to this? Does anyone know? I am assuming that since people have been making these for ages that either there is a trick this or there is no "perfect" with tulle, and you just accept it and move on to the next step. So if it's not perfect don't fret.
I used thick floss to gather my tulle/net and then I sewed it in place before attaching to my waistband. I did a simple folded over waistband and attached my tulle/net layer to one side and my slip/lining to the other. I also added the bias binding to my tulle/net hem to avoid scratches and add a decorative element. Usually in the posts I've seen petticoats have a shiny ribbon like binding. I did not see this at the store and did not want to attempt making my own slippery binding so I made my own out of cotton fabric. I think it turned out very well gave the garment that extra something. Maybe even a little more grown up than the ruffle fluff bottom of other petticoats.

Thanks for reading♥ Olivia