Wednesday, July 30, 2014

Making a Petticoat

Since I have enjoyed the dress I made so much I wanted to make it a little more special with my very own petticoat. I'm thinking these will come back in style if they have not already.
After stumbling across a few Pinterest pins referring to petticoats I decided, I want one too. Practically everyone claims how easy it is to assemble a petticoat and while I don't disagree there is however a certain amount of time involved.
Mine as you can see is a simple 2 tier petticoat with an added underlining or slip to avoid the stiffness and the scratchiness of the petticoat net. I purchased a net/tulle that specifically said petticoat on the label. It's pretty stiff and could definitely add a lot of fluff. I could have really bunched up and gathered my tulle and had tons of fluff but I wanted this to be practical with the dress I would be wearing it with. An example being if my dress or skirt was more like a circle skirt and very full then it could accommodate a lot more fluff from my petticoat.
No matter what tulle you purchase even the smaller finer net is near impossible to cut perfectly straight. I tried several things with my mats, ruler, weights and other sewing notions and still struggled to get a perfect cut of fabric. Is there a trick to this? Does anyone know? I am assuming that since people have been making these for ages that either there is a trick this or there is no "perfect" with tulle, and you just accept it and move on to the next step. So if it's not perfect don't fret.
I used thick floss to gather my tulle/net and then I sewed it in place before attaching to my waistband. I did a simple folded over waistband and attached my tulle/net layer to one side and my slip/lining to the other. I also added the bias binding to my tulle/net hem to avoid scratches and add a decorative element. Usually in the posts I've seen petticoats have a shiny ribbon like binding. I did not see this at the store and did not want to attempt making my own slippery binding so I made my own out of cotton fabric. I think it turned out very well gave the garment that extra something. Maybe even a little more grown up than the ruffle fluff bottom of other petticoats.

Thanks for reading♥ Olivia

Sunday, July 27, 2014

Pattern weights

Pretty little triangle pattern weights. 
I saw a post on Pinterest to make these pattern weights and I thought I sure could use those particularly with my garment sewing so I whipped them up. It's a pretty quick easy tutorial on Tea Rose Home's site. The only exception I made was I just cut out my own triangles using my equilateral triangle ruler instead of downloading the pdf. 
I used leftover scraps of this dressmaking fabric and decided to just make as many as I could cut out which ended up being nine. I do think these would make great gifts for some ladies I know. Quick and easy too!


Thanks for reading♥

Friday, July 25, 2014

Fabric Love Friday

Reign of the roost postage by Susan Winget. I simply love this old vintage postcard look not sure what I'll make but I have a yard.

Wednesday, July 23, 2014

Cute finds

Colorful tape measures... I saw these at Jo-Ann's for just a buck and had to have them!

Sunday, July 20, 2014

Adventures in dressmaking

Adventures in dressmaking... It's been a while since I've attempted making a garment. Usually I am disappointed by the fit or lack there of and just give up. Then some time passes and I think hey I should make something I can wear. And sew it begins.
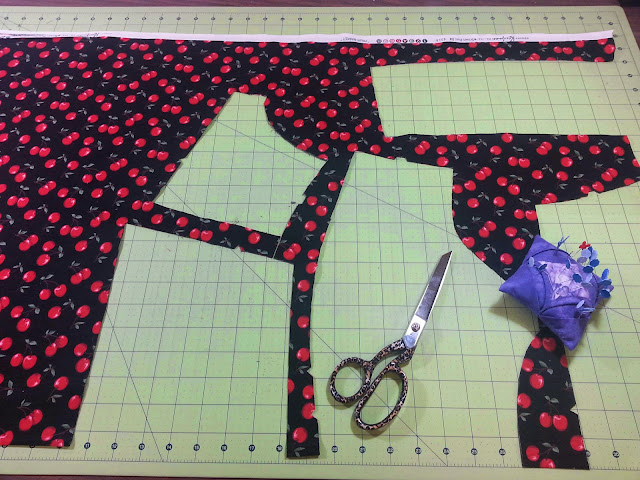
I took the leap and altered a pattern I had already purchased. Ages ago I made a dress, loved it but the garment never fit and alas sat in my closet for almost ever. I really liked the style so I decided to increase the size of the dress on my own and do some bust altering to better fit my boobs. Below is the completed garment (sorry I'm not wearing it) I will photograph the fit the next time I wear it. I loved how this turned out so much I plan on making it again in another fabric.
Have you tried your hand at making adjustments to a pattern? How did it go?

Thanks for reading♥

Friday, July 18, 2014

Fabric Love Friday

Florica by Peter Pan Fabrics. I am a total sucker for swirls I remember I got this at Jo-Ann's many years ago and have never seen it since.

Friday, July 11, 2014

Fabric Love Friday

Timeless Treasures Fabrics, Library. I have probably said before how much I love this fabric and I just can't say it enough ♥♥♥♥♥

Tuesday, July 8, 2014

Wedding Ring Bag


This started out from a picture a friend posted online. Many people liked it and soon a conversation was started. Obviously we had seeked out an original source and pattern and unfortunately it's from a book out of print and in Japanese. So we decided that we could figure it out. Seeing instantly it was basically a wedding ring quilt and some simple geometry to create the bottom. I set to figure out the construction with the help of my friend and fellow sewer.
Here's my construction below. Which is four connected wedding rings leaving an open end at the right to connect with the left side later. Also you'll notice that the bottom is quarter sections of the center of the wedding ring block (with a 1/4" seam allowance added). Now it could be there is a way to add the bottom as one whole block center but this is how it worked best for me plus I wanted to quilt my bag.

Here is my un-quilted sandwich laid out.
I must not have captured that I quilted the top leaving enough room on either end to connect my rings and make my bag a tube. 
Below I am sewing the bottom in sections and binding as I go for a more finished look.
I do two opposite sides first binding each.
Then I sewed the final seam along the bottom making sure the other two seams flipped opposite ways to avoid bulk.
Here is the inside bottom of my finished bag.
Here's a peek at the outside bottom. You can see the finished bottom is same as the center of the block.
I have bound it but not added handles.
Here it is again without handles, which I kinda like better than the final product which is with handles. Sorta makes a nice fabric bin. The first two photos I captured the bag with handles which I had just hand sewn on.
Very roomy as well holds lots of yarn, great for that afghan I'm working on.
What do you think? Would you want to try making one of these? Would you want another post with more step by step instructions? Or if you have any questions as to how this went together please leave a message in the comments.

Sunday, July 6, 2014

Quilt Labels

Sometimes I get excited to finish a quilt and forget to put the label on. So for those I just whip up a quick label with interfacing and some fabric and then hand sew onto the back of my quilt.

Friday, July 4, 2014

Fabric Love Friday

Jo-Ann exclusive. I really like the way this looks like the inside of an old book.